Device Management
Add a Device
Before you start:
• Ensure that your mobile phone client as well as the devices need to be added has been connected to the network.
• The QR Code can be found in the Quick Operation Guide or on the label of the device. Follow the steps below to add a device.
Steps:
1. In My Camera page, Click Device on the tool bar to enter the device management page.
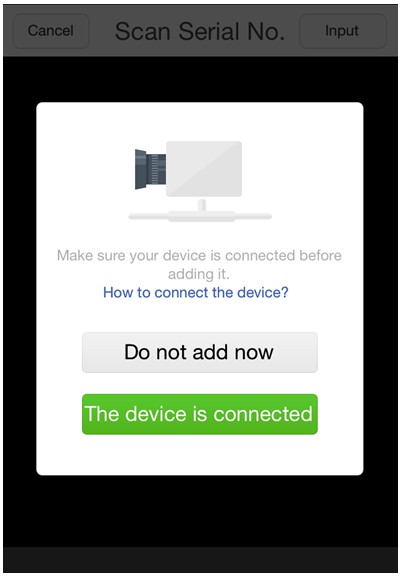
2. Click on the  icon to enter the connection preparing page.
3. Click on The Device is connected to enter the Add Device page. You can add a evice by scanning or manually entering the verification code of the device.
Scan the Verification Code
Align the QR Code or verification code with the scanning frame. The system will then automatically identify the device by scanning the code. Click on the  icon to add the device.
Manually Enter the Verification Code
Click on the Enter Code button on the upper-right side of the Scan Serial No page. Enter the 9-characters verification code into the textbox. Click Search to search for the corresponding device online. Click on the  icon to add the device.
Delete a Device
In the Device Management page, click on the  icon to enter the device details page. Click Delete Device on the lower side of the page to delete the device.
Edit Device Name
In the Device Management page, click on the  icon to enter the device details page. Click on the device name to enter the edit page. Rename the camera in the textbox. Click OK to save the settings.
Security Protection Prompt
Enable/Disable the Security Protection Prompt
In the Device Management page, click on the  icon to enter the device details page. Slide the Security Protection Prompt button to set the mode as ON or OFF.
Security Protection Arming Time
Steps:
1. In the device Details page, slide the Security Protection Alarm button to set the mode as ON.
2. Click on the  icon on the Arming Time bar to enter the schedule settings page.
3. Slide the Arming Time button to set the schedule mode as ON.
4. Set the start/end time of the arming Period. Tick the repeat date for the schedule.
5. Click Save to save the settings.
Notes:
• The security protection prompt can only work on the camera which supports the security protection function.
• The camera will enable the security protection function in accordance with the record schedule.
• If the security protection function is enabled, the system will send the alarm messages of the camera to your mobile phone on the first time of any abnormal events happens. You can view these messages in Message page.
Storage Initialization
Click the Device>Device Details>Device status>Storage to enter the Storage Initialization page. If the storage status is indicated as Uninitialized or Exception, Click the Initialization button on the right side of the page to initialize the storage.
Notification Sound Mode
Click the Device>Device Details>Sound Mode. You can set the voice mode as Warning, Reminder and Silence.